We are familiar with flat file imports using Maximo Integration Framework and it seems any layman will work it out. But to err is human so we tend to forget (intentioanally or unintentionally) some very familiar and simple steps that would actually make us save time banging our heads when we face encounter errors.
So, here is a checklist to consider while we are creating object structure, enterprise service and external system for flat file import through MIF.
We all are aware that for flat file upload first step is to create an object strucure. We need to remember that we need to select INTEGRATION in consumed by field and we need to select the checkbox of Support Flat Structure? We move on to select the main object, other objects (if any) with selecting the parent object as the main object and selecting the required relationship. We save the object structure. We need to follow the below steps:
- Select Action > Exclude/Include Fields - this is required to select the fields from main object and all child objects which will be kept in the flat file.


- Select Action > Add/Modify Alias - this step might be required if there are same attribute names in main object and child object(s). In this case, after saving the object structure the Alias Conflict? checkbox will be marked automatically. After renaming the duplicates, this checkbox will be cleared.


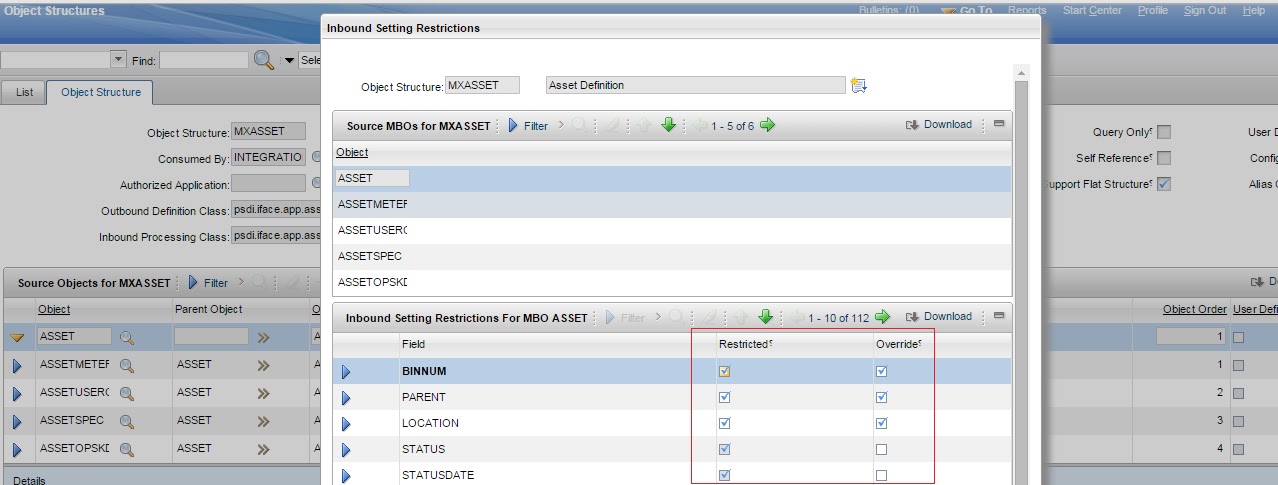
- Select Action > Inbound Setting Restrictions - this steps is required if we want MIF to use the autokey functionality for some field. If it is not restricted in the object structure MIF expects data in the flat file. For example, we are loading asset data and required attribute assetnum has a autokey defined in its object. We keep the values for this column blank in the flat file but while importing the flat file, we get an error "BMXAA4195E - Requred field XXX is blank". To avoid getting this error this step is mandatory and we tend to forget this step frequently.


We move on to create the Enterprise Service for our inbound transaction. We associate out object structure, select adapter as MAXIMO and operation as SYNC.
Next step is to create an external system for which end point should be MXFLATFILE. Outbound sequenetial queue, inbound sequential queue, and inbound continuous queue should be entered and Enabled? checkbox should be selected. Then we go to the Enterprise Services tab and associate the enterprise service createt and uncheck the checkbox of Use Continuous Queue?
Next step is to get ready with our flat file. Flat file should be with extension .dat and first row in the file should consist of External System Name, enterprise service name, action (Add/AddChange/Change/Delete/Replace/null), and language. Second row consists of all the column names specified in Exclude/Include Fields window of the Object Structure. Third row onwards consist of the data to be imported. Ensure to remove extra commas from the flat file.
Now from the Enterprise Services tab in the External Systems application, select the enterprise service for which you want to import the flat file and click on Data Import button.Select the radi box for Flat File and select the checkbox Import Preview? Choose the flat file and click OK.

If you get a message "BMXAA5621I - The data import preview mode is successful", then again click on Data Import button. Select Flat File radio button and this time do not select the Import Preview? checkbox. Choose the same flat file and click OK. Your data should be imported successfully.
PS: For better error tracking and management, you should also enable message tracking in the Enterprise Service. From the select action menu, choose option Message Tracking and in the Message Tracking Setting dialog window, check the Enable Message Tracking? checkbox.
No comments:
Post a Comment